How to set up your free Google Compute Engine instance
If you’re looking to experiment with cloud computing, host a personal blog, or run small-scale tests without taking on extra costs, the Google Cloud free tier is a perfect starting point. This guide walks you step by step through setting up a Google Compute Engine instance that stays within the free tier limits, giving you a fully functional cloud server—for free.
Because it’s an e2-micro instance, it comes with limited resources, so it’s not suited for large production sites or resource-intensive applications. Still, it’s a fantastic way to learn, prototype, or deploy a small personal project. Let’s jump in and get started!
Step 1: Set Up Your Google Cloud Account
If you don’t already have a Google Cloud account, visit the official Google Cloud sign-up page to create one. New users are typically eligible for $300 in free credits, which you can use to explore the free tier safely. Even though you need a valid credit card for verification, you won’t be charged as long as you stay within the free tier limits. If you already have an account, you can skip this step.
Step 2: Create a New Project
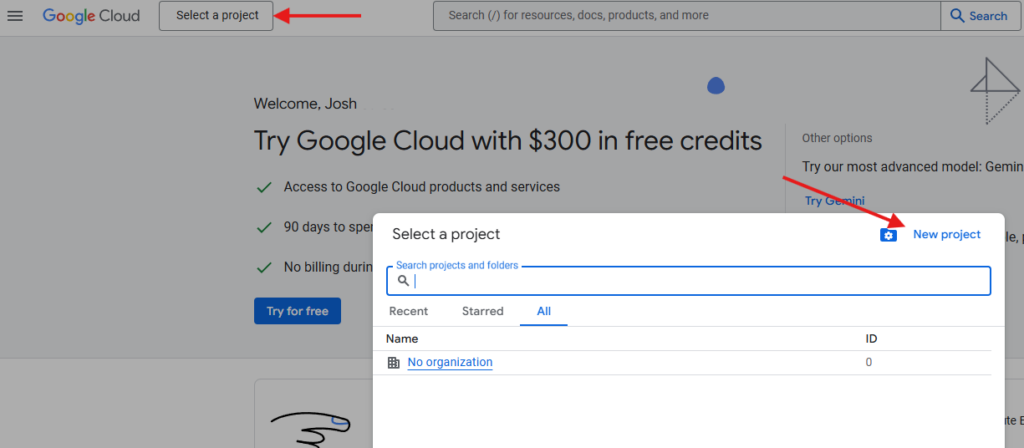
- Click Select a project
- In the popup select New Project
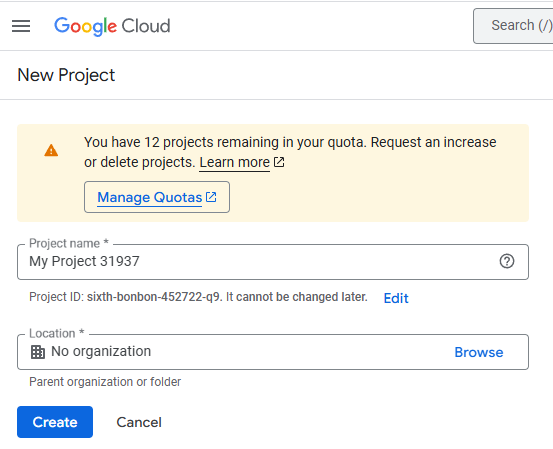
- Name your project whatever you like, and put whatever you want for the location the click Create
Step 3: Set up your Compute Engine
Now we’ll create our virtual machine using Google Compute Engine. Enabling the API and billing is necessary, but don’t worry—you only get billed if you go beyond the free tier limits.
- Enable Compute Engine
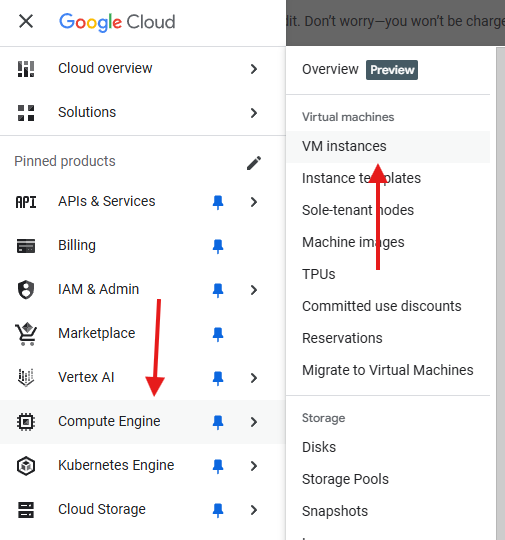
- Go to Compute Engine -> VM Instances
- Select your new project if prompted.
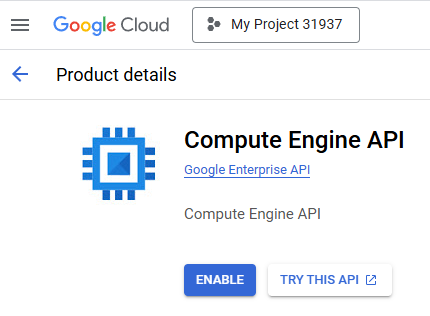
- Enable the compute engine API in your project.
- This requires you to enable billing. You will only get billed if you use anything outside of the free tier. Follow the prompts to enable billing.
- Once enabled (This may take a while), create a new VM instance with the following specifications:
- Machine Configuration:
- Machine type:
e2-micro - Region:
us-west1,us-central1, orus-east1
- Machine type:
- Machine Configuration:
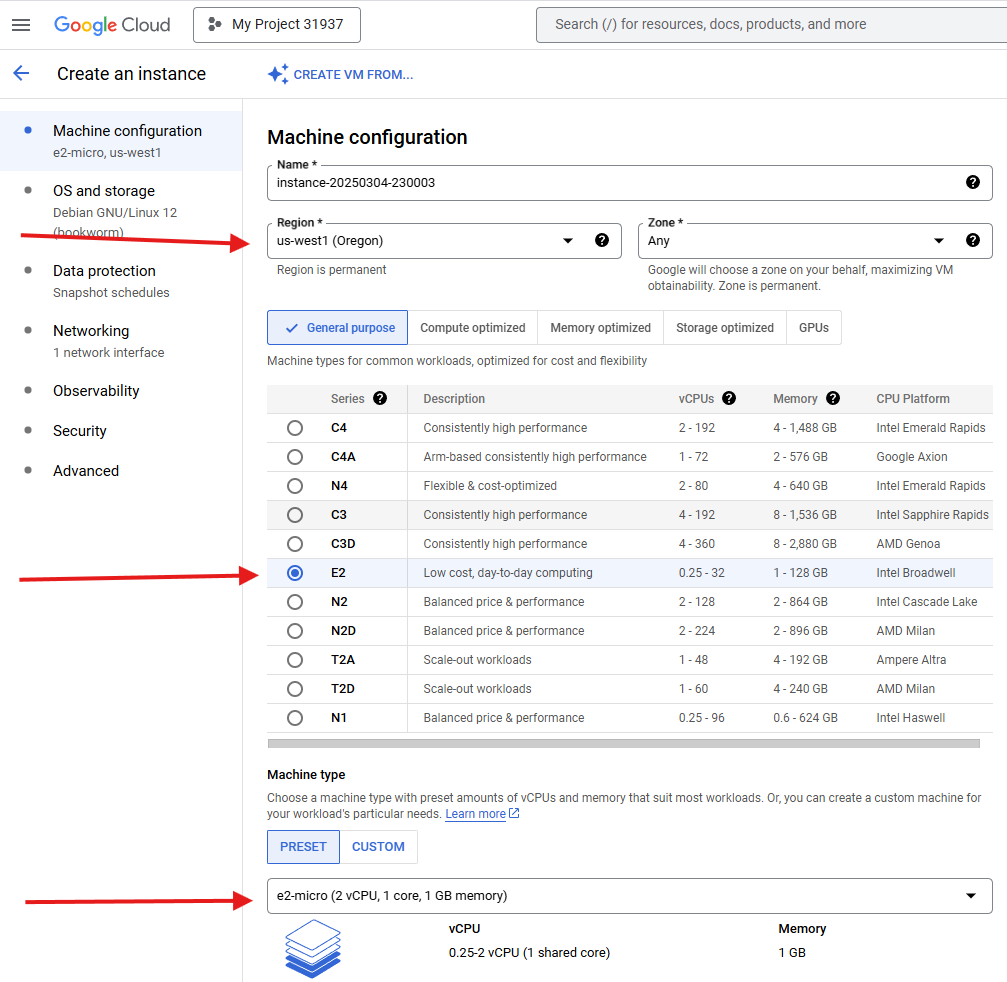
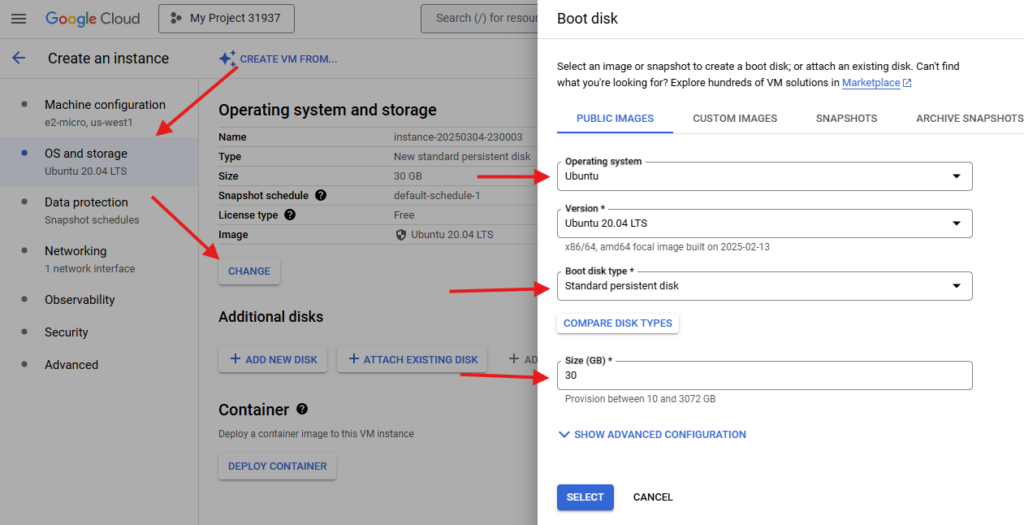
- OS and Storage
- You can select any starting image you want, I will be using, and basing future posts off Ubuntu
- Boot Disk Type: Standard persistent disk
- Size 30GB (Make sure this is still the valid size for the free version)
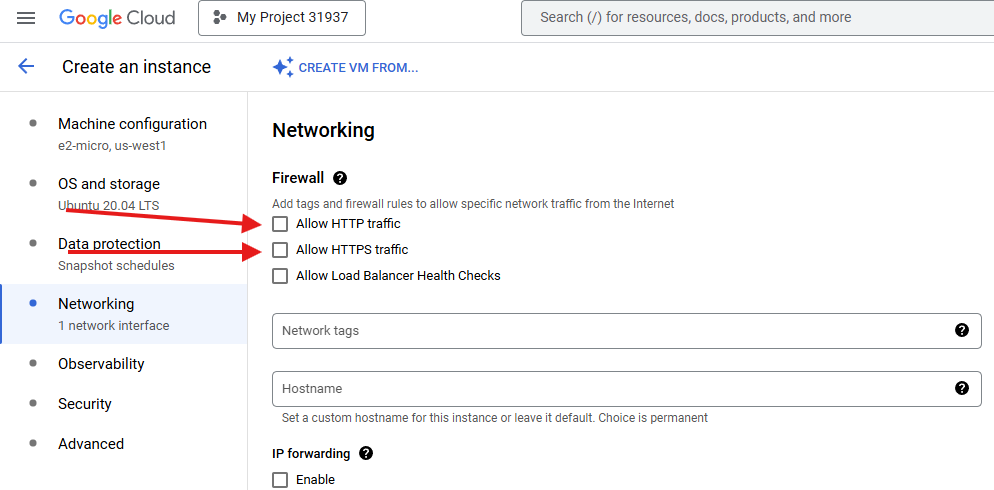
Optional:
- If you will be using this as a website, Click Networking and select “Allow HTTP traffic” and “Allow HTTPS traffic”
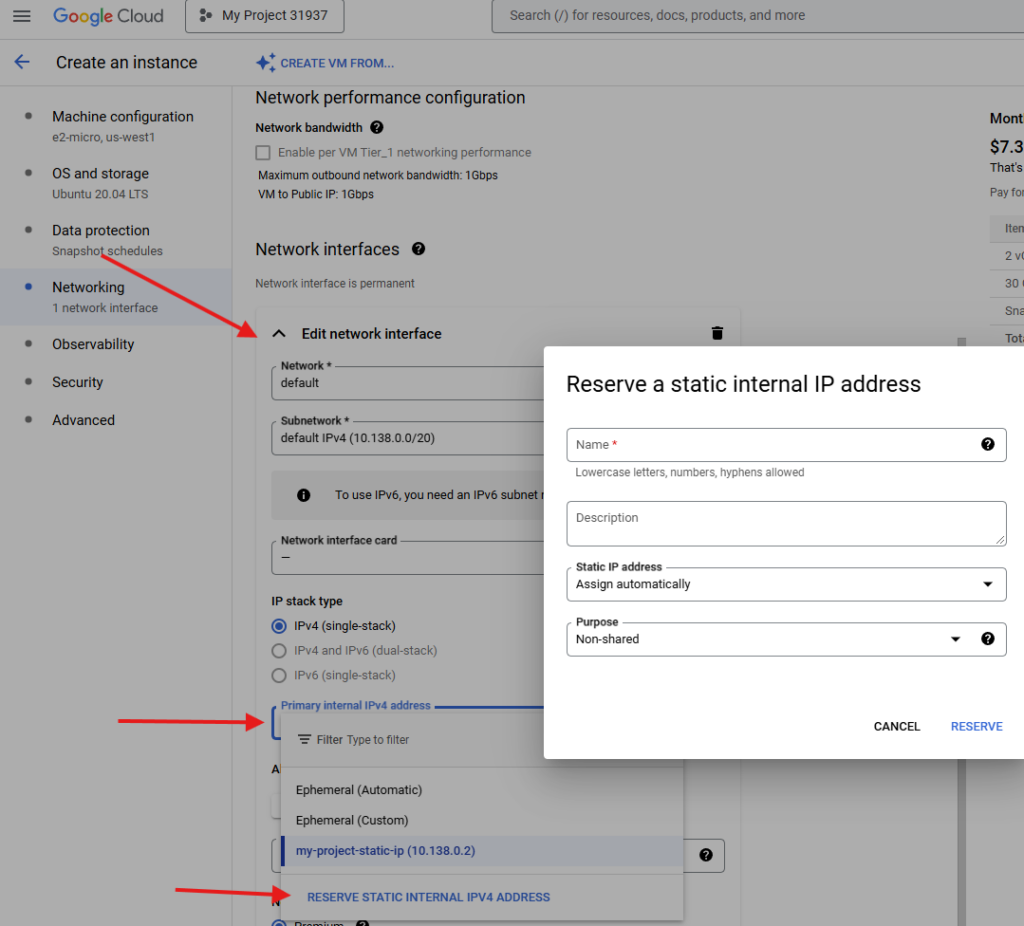
- Select your network interface and under IP Stack Type, click Ephemeral and switch it to Reserve Static Internal IPV4 Address, select and reserve (Again verify this is still included)
Ephemeral vs. Static IP
An ephemeral IP is assigned automatically and may change whenever you stop/restart the instance.
A static IP remains the same even if you stop or restart the instance. Some static IPs might not be free, so double-check Google’s free tier terms before reserving one.
- Once finished, click the Create button at the bottom and wait for it to load
Conclusion & Next Steps
Congratulations! Your new Google Compute Engine instance is up and running. You can now SSH into it and install any software you like. Because your VM is limited to 1GB of RAM (the free tier allocation), it’s a good idea to set up a swap file to help avoid out-of-memory issues. Below are the commands to create and enable a 2GB swap file—feel free to adjust the size to your needs.
# 1. Create a 2 GB swap file (adjust size as needed)
sudo fallocate -l 2G /swapfile

# 2. Secure it by limiting access
sudo chmod 600 /swapfile

# 3. Format it as swap
sudo mkswap /swapfile

# 4. Enable it immediately
sudo swapon /swapfile

# 5. Persist it across reboots
echo '/swapfile none swap sw 0 0' | sudo tee -a /etc/fstab
That’s it! You now have a stable environment to experiment with. If you plan on hosting a small personal website or testing new web technologies, you’re in good shape. Just remember to keep an eye on your resource usage to stay within the free tier limits. Enjoy your new cloud server!

